Acrylic Paint is one of the most versatile and popular medium. They are low maintenance, fast-drying and are available in numerous range of colors and consistencies. The versatile nature of acrylic draws all artists towards it. They feature a unanimity that other mediums cannot offer.
One of the significant character is their adaptability. When you mix them with gel, medium and additive to thin or thick the paint, it blend smoothly, becoming part of it. Oil and watercolor do not behave in the same way.
Acrylics are very flexible to be painted on any surface like canvas, fabric, wood, metal, etc. Their opaque and fast-drying nature makes them
forgiving, letting you cover up mistakes with another layer of paint.
There are different kinds of acrylic paint like basic, fluid, and heavy body. They are differentiated based on their consistency, pigment content, saturation, and some other factors.
These distinctive properties can be well understood when you try using them on your own. To learn simple acrylic painting step by step, check out Painting with Acrylics.
Acrylic Painting for Beginners
The creativity is endless in acrylics as there are many techniques that one can try. With different types of brushstrokes, textures, effects and paint mixing, one can keep experimenting. If you have just started using acrylics, read this article to get a good hang of basic acrylic painting techniques which you can use. Also read Acrylic Painting Tips to avoid some common mistakes while painting.
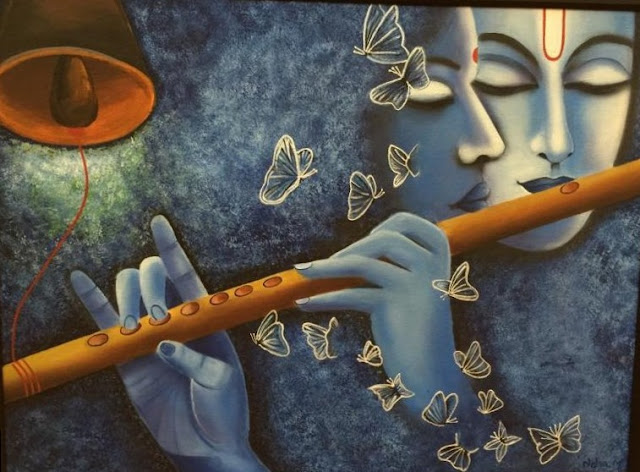
1. Small Round Brush
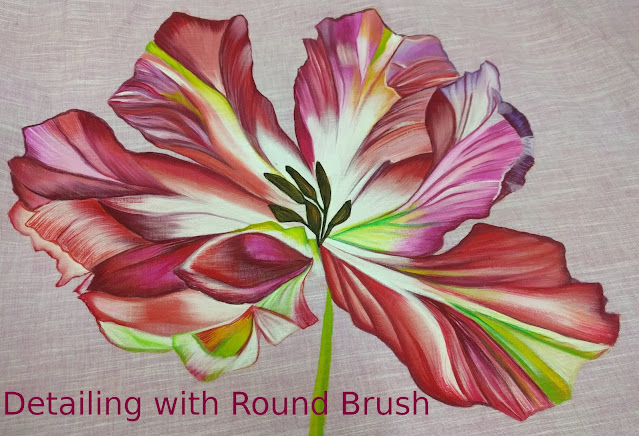
A round brush is the most common type of painting brush. They vary in size from a very large radius to a very tiny radius shaped like a sharp needle. The typical tiny round brush will produce a point with its bristles.
The large round brushes are used to fill larger areas, while the small pointed round brushes are mainly used to detail and intricate work. The sharp lines in the picture above are done with small round brush.
How to try this?
Load
the brush with fluid paint, hold the brush firmly and apply little pressure to create straight fine lines. Make sure the brush has a sharp needle like end in order to get crisp, fine lines. After you get a heck of it, practice this further to create
branches, leaves, flowers, swirls, and so on.
2. Dry Brush
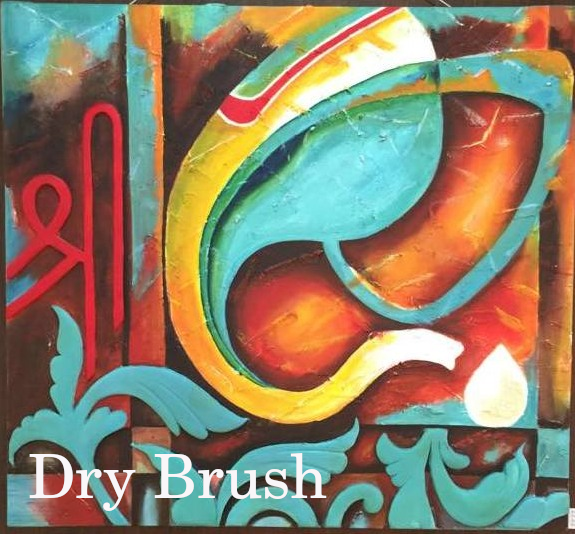
Dry brush is using brush that is not dipped in water. Just paint is enough. It is used for highlighting or adding a touch of color to something. As the brush hasn't been dipped in water, you may produce a scratchy, textured, irregular movement of lines on your canvas.
Make sure your brush is dry enough and packed with paint for the optimal effect. Dry brush is comparatively simple to execute.
How to try this?
Load a dry brush with paint. Wipe the excess paint with a paper towel. Now gently sweep the brush over the surface. You will see strong color patch and hard edge strokes. This is the effect expected from dry brush.
You can achieve different values by altering the pressure and paint load onto the brush. Essentially all it needs is to be translucent. It can be used to add highlights or texture to things.
3. Washing
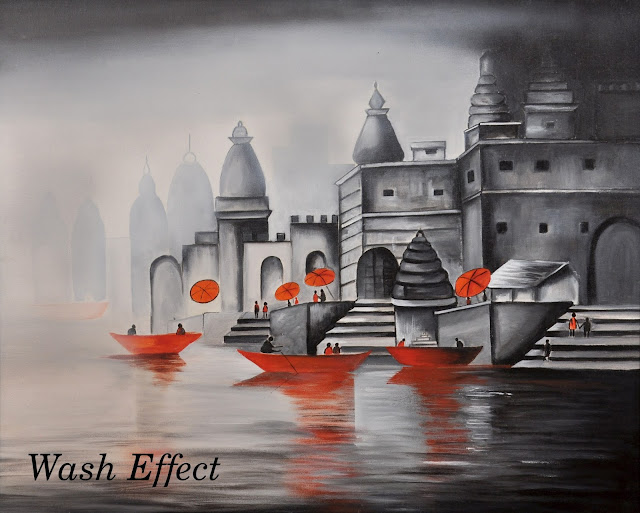
One of the most notable qualities of acrylic paint is its ability to alter its consistency. In wash technique, paint is diluted for watery effect and bring out a softness that resembles watercolor. Equal parts of water and paint can be used to get wash effect.
How to try this?
Dilute your paint with equal water to create a translucent wash. Load a flat brush with this diluted mix. Apply horizontal strokes over the selected surface. However, vertical and diagonal strokes can also be used.
Just ensure strokes are in one direction, and it covers the complete surface without leaving any canvas area. This helps to build a ground for the next layer of colors. It hides any paper or canvas showing their white background.
4. Stippling
Stippling is a technique to cover any area with tiny dots. It is collection of dots to show a design, shape, shadow or contrast. It adds texture and dimension to the painting.
Artists
create varying stippling effects by varying the dots assemblage and how big or small the dots are. The method involves using a stiff
brush dipped in paint and then lightly dabbed on the surface. The above painting shows shades of blue and white stippling with hard brush.
How to try this?
Take a old ruined flat brush that has hard tip. You only need to use the brush tips. Hold your brush upright and with some pressure, create tiny dots next to each other. You must continue doing this till you see a larger blob of color. You can use several colors to provide the illusion of depth and shadows.
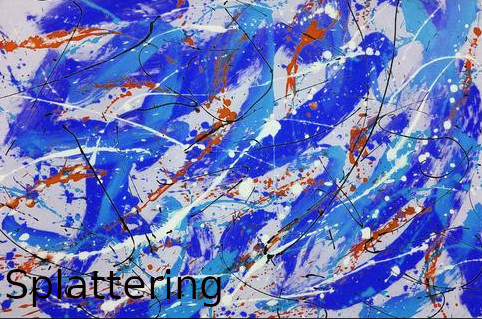
5. Splattering
Splattering is a technique to splash paint on canvas or paper. Some paint gets scattered while some get diffused on the surface. From large drops to fine mist of paint, all sizes can be seen in this technique.
Splattering is a fun and messy technique, hence always cover the workspace before starting this. Trick to keep it simple is by using three to four colors only. It is widely utilized in abstract artwork to get those lovely pops of color.
How to try this?
To splatter, thin your paint down with water or medium. Paint should easily fling or splatter off your brush randomly. Here, you can use an old paintbrush to splash colors onto a large canvas.
Use stencils to confine the splatter to a particular area or a pattern. You can also flick the brush or tap the handle with another brush based on what result you desire.
6. Dabbing/Sponging
Much like the name implies, dabbing is a technique to"dab" accents of color on the surface using a brush or sponge. Adding multiple layers will create more depth. Dabbing adds movement to your painting and is frequently used to illustrate bushes or greenery. It's aesthetically pleasing, great for foliage, and difficult to mess up.
How to try this?
Squeeze a little paint on the palette. Dip a wet foam rubber sponge in the paint and press the sponge to the canvas, then quickly remove it. Do this several times to create a dabbing effect. The appearance of the resulting feel is dependent upon the amount of paint and the pressure applied to the sponge.
7. Painting knife
Painting knife(Palette knife) has thin blades stick onto wooden handled that comes in variety of shapes and sizes. The blades have pointed tip and a flexible blade which is suited for canvas painting. Applying small patches of colors using the blade which is swiped across a canvas, creates beautiful texture.
Wide variety of marks and effects can be created with different shapes knives. Use a small short blade to create crisp and sharp stokes; use a long blade to lay impasto texture; use a rounded blade for dabbing colors and build layers; use a sharply-pointed blade to scratch into the painted surface for showing the bottom layer.
How to try this?
Take a heavy body paint in your palette. Hold the knife handle firmly and press your thumb on the top for a good grip. To load the paint sweep it up from the palette using the long edge of the knife.
Sweep the paint on the canvas using the flat side of the blade. The technique is similar to frosting a cake. The move should be swift and do not apply a lot of pressure to the knife. By varying the pressure and angle, different strokes and textures can be created.
8. Blending
Blending acrylic paint is one of the most important technique to produce artistic effects in your painting. You can mix two colors seamlessly and create realistic skies, sunset or backgrounds. You can use acrylic blending medium to slow down the paint drying time. This will give you additional working time to blend acrylic paint.
In the above painting, yellow blends with green and blue color smoothly. Soft edges give a natural blur with the transition from one to another.
How to try this?
Wet on wet: Take a damp brush and dip it into the paint. Make sure there is enough paint on the brush. Cover a small area on the canvas by going back and forth in a horizontal direction. There should be enough paint on the surface, so the brush glides smoothly.
Now clean the brush, dip it in another paint and start painting from where it touches the first color. Blend the two shades and paint the next color from there onward. Take another blending brush and make the two colors come together by blending it smoothly.
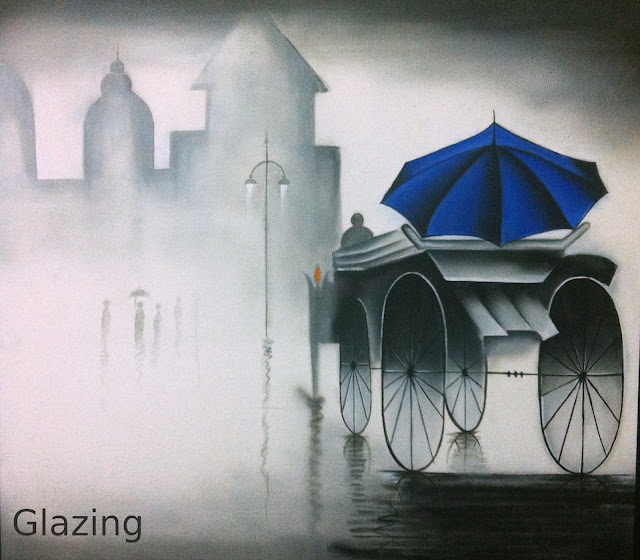
9. Glazing
Acrylic paint is thinned with water to lower viscosity, and this is used to create a thin, translucent film called the glaze. The surface looks rich and luminous. This technique is commonly used to create mist or light.
By applying a transparent layer of glaze over a different layer of opaque paint will produce a distinctive stained-glass effect. Do not use acrylic mediums for thinning the paint, water gives the best glazing effect.
How to try this?
Mix 90 part water and 10 part fluid paint, then apply a thin layer of this mix over an opaque painted surface or over a wash. It adds sheer and graduated color effects which gives depth and sophistication to your paintings.
In acrylic paintings, a good illustration of glazing is where you see the glaze clearly along with the background color of the surface. Always apply glazes with a soft brush in order to minimize brush strokes and streaks. Finding the right consistency in the glaze will take some practice.
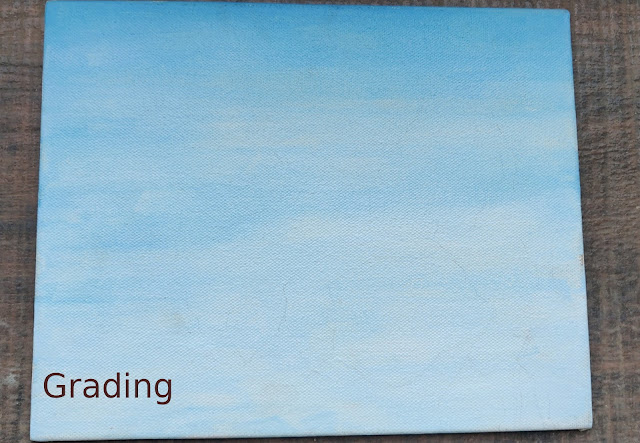
10. Grading or Fading
Have you seen the beautiful sky filled with shades of blue? Did you notice how the blue sky becomes more white as it nears horizon? This is called grading.
This clear gradation between colors creates value to show separate colors and doesn't cause a blending effect.
How to try this?
Dip a brush in paint and apply horizontal stroke like you would do for acrylic wash. Now dip the brush in water and apply it next to the previous stroke.
The water will dilute the paint and create a fading effect. You can also try with the second color(diluted version) instead of water.
11. Sgraffito
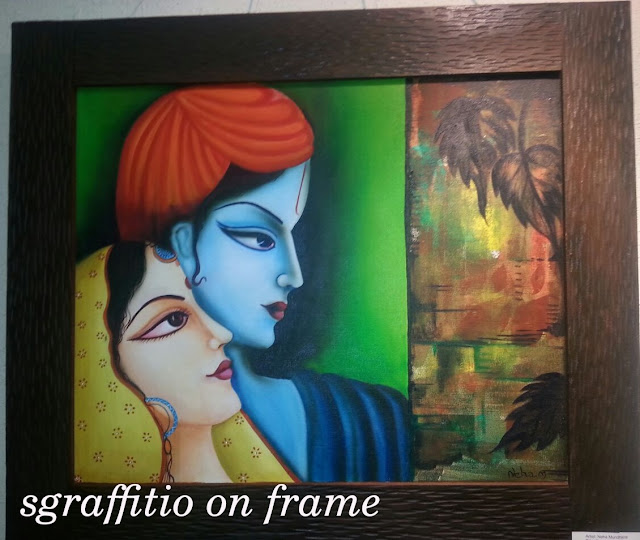
The technique involves scratching the upper layer to show the coating of paint underneath. Graffiti is not just for canvas but also on the surface like wood, pots, painting frames. On a canvas, it is often used for adding highlights or thin blades of grass in a landscape. The creative possibilities for sgraffiti are infinite.
In the example above, a wooden frame is handcrafted to give sgraffito effect. This scratching is done by the small and sharp-pointed tool.
How to try this?
For this technique, apply thick layer of dark color paint on the surface. Let it dry completely. Now apply gold paint or paint lighter over the dry layer.
Before it dries, scrape a line, a pattern of triangles, stripes, dots, or whatever shapes you want through this layer of paint using the other side of the brush, a little rod or a toothpick. This centuries old technique is most commonly used in pottery and sculpture making.
12. Impasto
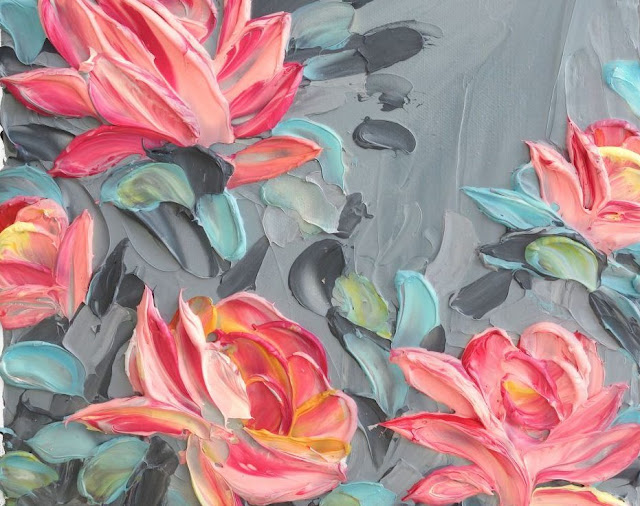
The impasto painting procedure leads to an extremely textured, densely painted surface. A good amount of paint is applied onto the canvas to bring a 3D look like a foilage that stands out from a flat surface.
Often many layers of paint are required to create the desired depth. When the layers rise above the flat surface, effect is visible. Use heavy body acrylic suggested or paint, which has high pigment content.
How to try this?
For this technique, squeeze a couple of colors on the palette first. Using a palette knife, scoop up a sizable amount of paint and move it to the canvas. Then wipe the knife clean and scoop up another color, placing it near the first one on the canvas.
You can apply this either on a small portion of canvas to form peaks with knife.
13. Create Texture with Gel
This is yet another good acrylic art technique that a beginner can rely on.
It involves the use of fluids which can be readily added to paint to help improve its consistency, texture and drying period.
The good thing with painting using acrylics is that there are different mediums that could help make the paint shine or matte.
One of the must qualities of the medium is its capacity to be used on multiple surfaces and mixed with other media.
Textures can be used in various ways. If you want to get an idea on what to paint on using texture, find a subject to paint.
14. Understand how brush and surface interact through texture
Experiment with various brushstrokes to obtain the effects that would best fit in with your painting. Try out applying mediums to explore potential textures that might give the realistic in your landscape.
Overall, do not worry going over multiple surfaces since you experiment with paint, especially when you are starting out. For every layer you made, you have seen something new.
Trying out different textures, a few of them will work while others will not, do not worry. Its better to try and see the result yourself rather than not trying at all.
Some Last Thoughts:
Once you finalize your painting, seal your painting. Use a varnish to protect your painting from dust and UV rays. The sealant is a thin transparent coat which safeguards your painting for years to come.
Practice makes a man perfect! Do basic exercises regularly in your sketchbook to help enhance your abilities.
Acrylic painting requires training and the more you train your hand, mind and soul with the skills, the better you will receive!
It is important to practice every new technique you learn.
Always have a sketchbook handy which you can pick up anytime and try any method. It will also help you see how you have progressed over a period of time.
