In an artistic journey, mastering brush strokes is important to transfer your imagination on the canvas. Once you are comfortable in dashing your strokes fluently, you have won half the race. Let us discuss different techniques an artist should incorporate in their skill set.
The most commonly used brush is a flat brush for Acrylic Painting. Their long bristles produce smooth patches of color, make long and bold strokes. Bright, Shader, Wash, and Filbert are types of flat brushes.
A bright brush is a flat paintbrush with shorter bristles and a slightly tapered edge. The shorter bristles allow for an easier grip on the paint.
A flat shader brush is another name for a flat brush, but typically shaders have longer bristles. It is excellent for mixing colors.
A wash brush is usually a broad brush with thick hairs. It is used
to fill large areas like giving tonal ground for any painting.
Flat brushes are all-purpose brushes. Flat brush sizes vary from 000 and then go to 00,0,1,2 and higher. Size represents how wide the bristles are. As there are no industry standards, a size one brush in one brand will be the same as size three in another brand.
These brush bristles could be produced from either natural hairs or synthetic fibers. As water is medium for acrylic colors, it is best to go with a flat synthetic brush. They are much cheaper than natural hair bristles brushes.
Generally, a short-handled brush is used for detailed work, while a long-handled brush covers broad space.
As a beginner, buy a paintbrush set from any good brand so that you can enjoy working with a range of brushes. Starter kits are great for hobby enthusiasts, seasoned painters who appreciate good quality brushes at a fair price.
Below are seven different brush techniques that I would discuss about in this article. Spend some time to master these techniques and they will help you build perfect art.
1. Acrylic Wash
Acrylic paint is mixed with ample amount of water to reduce the viscosity and create a thin wash. Thin layer is applied on the surface which when dries gives a watercolor effect in the background. The tiny pigment particles are randomly seen on the surface. Paint to water ratio must be correct in order to give complete watercolor effect. There is no ideal ratio but one can try with 1: 10 paint to water ratio.
Use a wash brush or a mop brush also works. Wash technique gives you a fool-proof way of developing a tonal mood on your work. There are multiple ways to do this technique.
How to do -
Use a wash or mop brush and dip it in water. Take paint in your palette, mix it to get a watery consistency. Start applying thin layer on the canvas quickly to avoid patches. Cover the complete canvas area this way, so it looks even.
Another way is to paint a thin coating of water onto the canvas, then load your brush with the paint. Start painting in one direction. Based on the appearance you are trying for, you can paint left and right, diagonal, etc.
To create a nice smooth, clean finish, use soft bristle brushes and operate every stroke in one direction only, instead of going back and forth. If you are a beginner, check this Painting with Acrylics.
2. Cross Hatching
Cross Hatching is a form of parallel hatching. You build up tone and texture with parallel lines. Lay down the first layer of parallel lines (in any
direction), and the second layer of lines is drawn on top in a
perpendicular or nearly perpendicular manner.
Hatching is the method in drawing to create tonal shading. This is extended to painting since it is a beautiful way to blend colors.
In hatching, the strokes of different colors are not smoothed together. After a closer look, you see each color and stroke separately. But from a far distance, you see optical color mixing where the colors are fresh and vibrant.
How to do -
Load a one inch flat brush with medium consistency paint, make an X pattern in one direction. Now without washing the brush, load the brush with another color and make an X pattern in the same direction. Keep adding this X pattern till you see a nice blend.
You can use a single color or multiple colors for cross-hatching.
3. Color Mixing
How to do -
Load a soft brush with one color and start painting in horizontal direction. Paint few strokes such that there is are no sharp edges. Acrylic dries fast. Hence without wasting time, load another color in the brush. Start applying the second shade near the first one very carefully. It is easy to blend the two colors as long as they are wet. The transition from one color to another should look blur.
The color tones must undergo a subtle change in each stroke to gradually produce an overall shift in color. The point where two colors meet should look merged and blurry. Practice this stroke with any size brush you get hand of.
To have more fun, load your brush with two colors. Let the colors blend freely and see the effect.
4. Swirls
How to do -
Load the brush with fluid paint. Gently hold the brush, apply moderate pressure, and start creating the curves by moving the meeting in the required direction.
Hold the brush perpendicular to the surface, so you get a fantastic grip, and motion is simple in most directions.
5. Lines
A round brush is ideal for outlining, but a flat brush of small size provides comparable results. Edge of a flat brush is often used to paint straight lines.
Creating a direct line using a brush can be very tough because the bristles tend to wobble, and it's hard to control the flow of the paint. It requires a very steady hand.
How to do -
To make that crisp straight line, you'll need to be sure your bristles are not damaged at the tip. If the bristles are fraying outwards or tip is not sharp, it won't work.
Also, make sure the paint isn't too watery or not too thick when doing outlines. Dip your brush onto the palette to get your bristles to collect together and to ensure that your paint is right there on the tip.
Hold the brush very lightly and move steadily to get a crisp, straight line! It requires some practice, but it is a fantastic exercise to practice brush control!
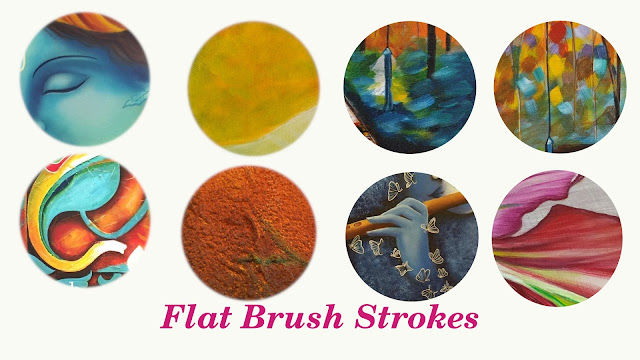
Above magenta color, floral painting has variety shades of magenta, pink and red.
6. Dry Brush

How to do -
7. Stippling
How to do -
Take a brush with hard bristles and load it with fluid consistency paint. Hold the brush perpendicular to the surface, and make every single dot evenly dispersed without pressing too hard. Move slowly by dabbing the brush slightly overlapping the pattern until you achieve the density and texture you want.
You can experiment with mixing a couple of colors graduating from one color to another. Do not use a brush with softer hair, they give blur and patchy effect.
Tip:
Every time you paint, remember, it is not a task to complete but a fun activity you started to get plain happiness!


